|
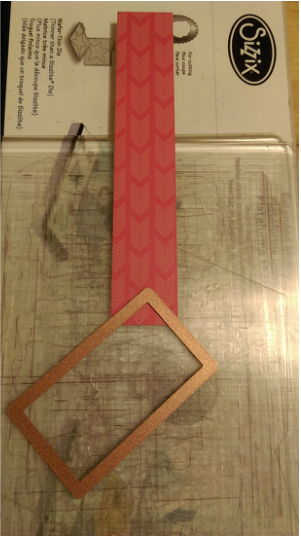
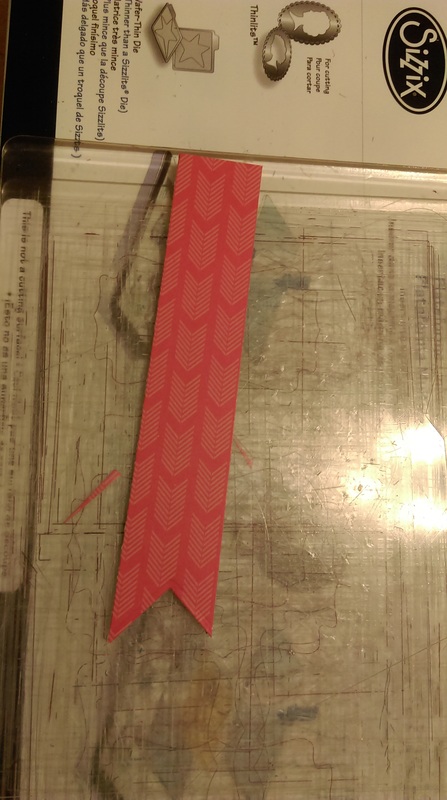
Hello everyone! If you remember my post re: "Just a Note" I had two tips to share: (1) Cutting Banners without a banner die (2) Keeping your workspace clean while crafting (1) Cutting Banners without a Banner Die I can't tell you how many times I have chopped up a banner flag I wanted to add to my card fronts. For the itty-bitty ones, don't really have too much of an issue, just notch in the middle and cut at each corner to the middle to make the flag. When things get a little wider and bigger, I start having trouble keeping things even. When I was making my cards from Just a Note, I thought that I would try to use the corner of my rectangle dies. I lined up the corner to make a triangle trying to keep the angles even on each side. Then I ran it through my Big Shot. You can see it is still not exactly perfect, but it is way close than I could have gotten it using the other method.
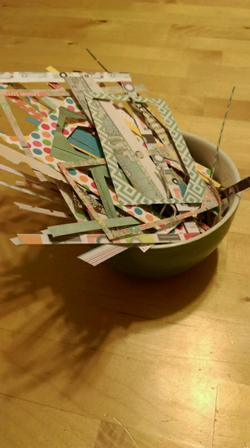 (2) Keeping your workspace clean I'll make an analogy from cooking -- a good chef cleans up along the way. I kept this little bowl out when I was working on the "Just a Note" set and found it to be really helpful in keeping my space clean! When I was done, I took it in one swoop to the recycle bin. I've also taped up a plastic take out bag to the table so I can sweep all my scraps into it. It has worked, but has ended up on the floor by the end of it. You don't have to use your fine china, if you have a mis-matched cereal bowl, or dip dowl in the cabinet, it should help out the next time you're crafting away! Thanks for stamping by!
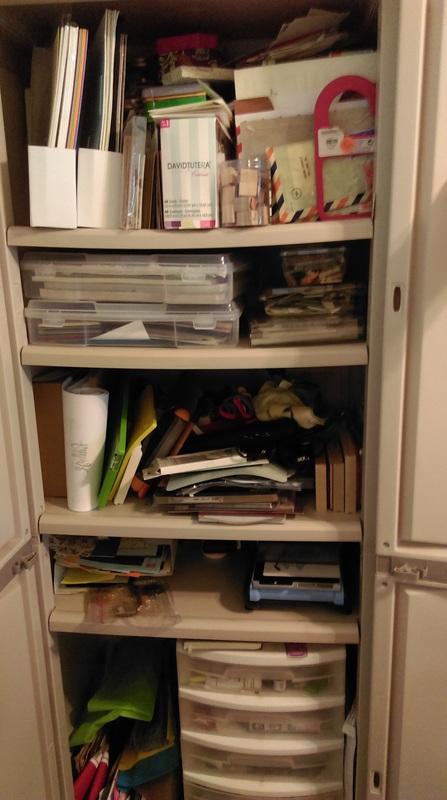
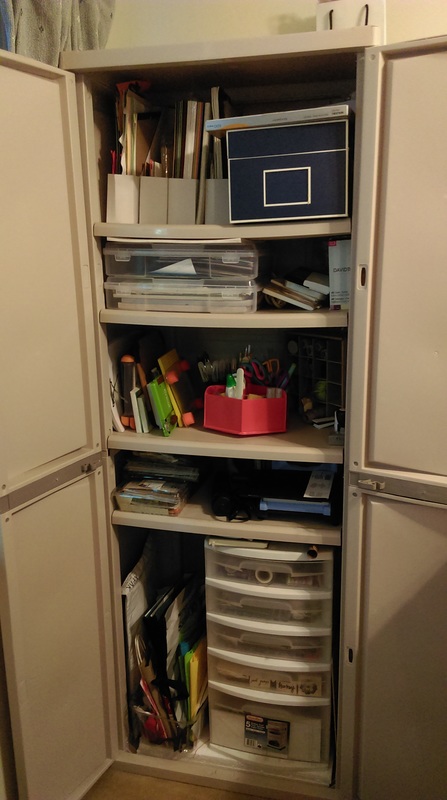
Hello everyone, Updating you on a long overdo project. If it wasn't one thing, it was another... And so it goes. Finally had time to put together pattern papers and make this set of cards for a co-worker. Based off a card I did a while back. Papers are mainly from my simon says stamp card kits, but i also included papers from My Minds Eye that I have had for a while now. For some of the pattern papers I couldnt bear to part with, i took a cue from an Amy R tip -- cut a panel out of the middle so that it leaves a border. Really helps with keeping the bulk down on the card. Card bases are a mix of neenah solar white, recollections (michaels) and Simon Says Stamp. Sentiment is from Hero Arts inked in Momento Tuxedo Black. Adhesive was all tombow mono multi (liquid). I prefer my tape runner, but haven't picked up refills yet. I always have a couple extra on hand, but also keep liquid adhesive when I'm a bind. Embellishment bows are twine/jute from my stash - all michaels. Rectangle dies are Spellbinders Card Creater (probably my MOST used dies). Tag dies are from Art C. Really great stamp and cut set. comes with 4 small sentiment stamps and three varied sized tag dies. For the banner cuts I used my rectangle dies. I tried to match the rectangle to the paper width and the i rotated a corner of the die so that it would fit inbetween my corners with the L-corner of the die would creater the triangle banner cut. Had to do some manuvering on my big shot to fit it, but overall worked well enough. I'll do a separate post to show the tip. I am still eyeing those banner dies by My Favorite Things. For smaller banner cuts i dont have too many issues cutting them out, but for larger widths I struggle with the symmetry. Anyone else feel the pain? #thestruggleisreal I hope you enjoyed my card set! Thanks for stamping by. 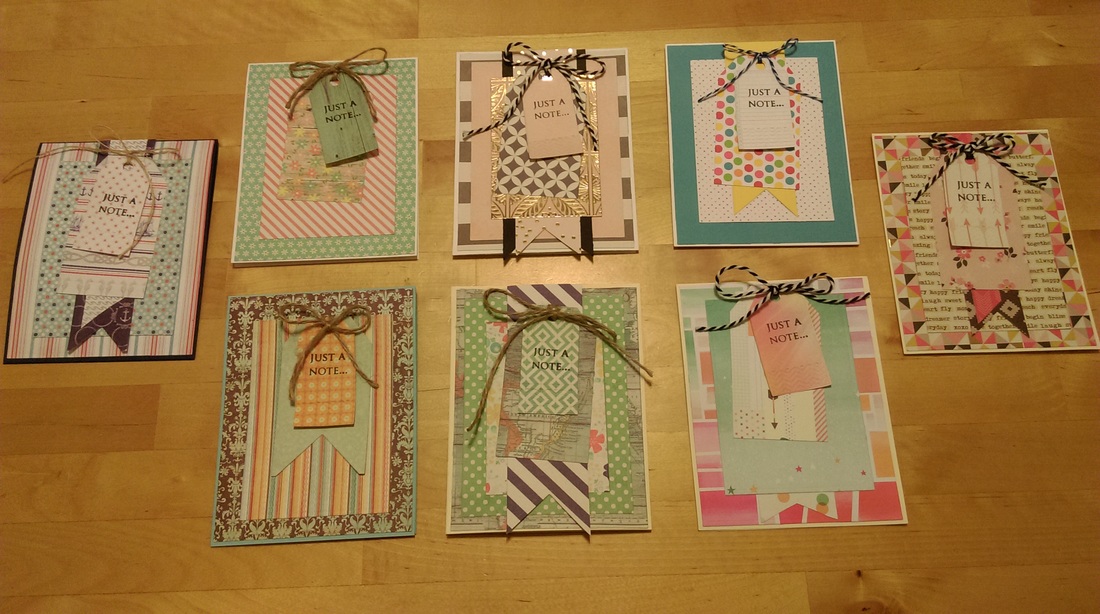 Hello Everyone, This is not a card post, but I wanted to give you an update on my 'craft area'. I currently use the dinning room table, and I am trying to be better in keeping it clean when I am finished with a project so that it can be used for it's primary purpose -- meals! In order to do that felt I needed a deep clean on my 'craft closet'. I have had this unit for about 8 months or so... maybe a year (I did not go back in the blog to double check) but either way it is has been heavily used since I got it. I really enjoy being able to have the space to store all my "supplies" in one spot. It is compact enough to push into the corner of our dinning space without losing the entire dinning 'nook'. To re-organize, I just took it shelf by shelf. Without adjusting the shelf spacing, I have been wanting a stand up access to my 8.5x11 paper. I found those magazine holders at Ikea (4 for .99! -- yes they are just cardboard and will get beat up. but they do the job for now). The top shelf originally held items I thought I would re-purpose (candle holders, fabric gift bags, gift boxes), it also help an overflow of "keep sakes" of cards, invitations and programs from over the years.. a project I still have not tackled in attempt to organize). The second shelf had my 12x12 papers I have either bought or been given since I started this paper crafting hobby. I received those 12x12 storage boxes as part of a christmas gift. You can also see in the "BEFORE" picture that the shelf also held some storage for embellishments, stencils and dyes. I recycle some of my plastic items the used to hold berries or vegetables, or candies! I like them because they are clear. Saves a few items from the trash.. I hope the frugal crafter would be proud! The third shelf I made my "utility" shelf, it housed my scissors, water color brushes, washi tapes, paper trimmers/cutters, MISTI, Fiskars stamp press, Any empty space I put "new" product to use. which still hadn't been used since purchase (anyone else relate?). You can see that shelf is just a mess in the BEFORE picture. The fourth shelf was smaller but just high enough to get my big shot in there. On the before picture you can see I have some of those magazine holders lying flat. Trying to figure out where to put them in the mix. And the bottom area housed my Sterlite drawers that I have had since COLLEGE. Those drawers were just a mess as well. In the open area I had tote bags, tissue paper, paper scrap box (again another recycle from the groceries). In the AFTER photos, I pulled all the magazine holders together. I most those 'gift' items to the very bottom unit. The blue box was such an awesome item I need to digress a moment to share what it is. It is also hiding those overflowing shoe boxes of paper keepsakes... >_< A friend of mine found that card box at costco about 2 years ago and there are handmade cards in there broken down by occasion. Such a WONDERFUL gift and I definitely used many of them before starting into this hobby. Slowly it morphed into a catch all storage for keepsakes and cards I would find in the $1 spots. Another project to reorganize, but for now, I have it a little more accessible in case I need to search for a premade-store card kicking around in there. I kept the 12x12 papers where they were. I added my water coloring supplies and some blank note cards (another gift!) accessible to use for a pinch when I want a quick. I have some metal mesh drawer organizer that I thought I was going to use at work, but instead of returning them to Target they found a home in the craft closet. For the utility shelves, I still trying to figure out a good way to keep all those flatter items from sliding around. I thought about getting a book holder to keep them contained. I kept my Big shot on the narrower shelf, but moved my embellishments, dies, stencils and heat gun to that shelf. Another repurpose item I love is that square cardboard shelf. It is originally held small candles.. I thought it was the perfect to hold my twine and washi! I'm still proud of the find (I took it from a friend when I was helping set up for a party. Yes, she poked fun of me, but she doesn't understand my crafty ways. For the five drawer storage unit on the bottom I also re-oranized the drawers one by one. The first drawer it utilitarian, it includes storage of extra supplies like reinkers, ink blenders, mini stapler, gift tape, and other small items. The second drawer are all my inks and embossing powders nice and tidy in those metal bins. The third and fourth drawers are all stamps. The third drawer is all clear/cling sets and the fourth drawer is all rubber (which I think you can see from the picture. I had a metal cookie tin that used to house some of the inks, but I took that out and used it to separate up my stencils and dies storage. For the clear/cling stamps, my biggest issue for storage is the packaging. The original packaging just shreds, and sometimes my clear stamps 'loose' their stickiness. I have been looking to get some of those storage pockets to help out, but haven't yet made that purchase. For the rubber stamps, the drawer is full but not tight, I could be tempted to get a few new rubber stamps If I run across some in. ;) The last drawer holds all my 6x6 paper pads and a few punches, and other misc paper (card and envelope kits). I wanted to move them up to the top shelf, but just didn't want to fuss with moving them out of the way each time to access those magazine holders for other card base paper. I went through the plastic bin for any scraps I wanted to keep and move them into a magazine holder. I recycled the rest. I then reorganized the plastic bin to hold the tote bags, tissue paper and gift bags. Behind that are some of the saved re-purpose items I am still keeping. That's it! it took a few hours, but it has been worth it! Here are some links to the items I am using for my craft storage: CRAFT CLOSET: http://www.osh.com/Osh-Categories/Home/Storage%2C-Organization%2C-%26-Housekeeping/Garage-Organization/Cabinets/Sterilite-4-Shelf-Cabinet%2C-25-5-8-Inch-L-x-18-7-8-Inch-W-x-69-3-8-Inch-H/p/6069132#prettyPhoto Metal Mesh Drawer Organizer: http://www.target.com/p/room-essentials-5pc-metal-mesh-drawer-organizer-set/-/A-13429669
Hi Everyone, A small haul to share. I was near FLAX this weekend and picked up a few items. I thought that wood adhesive tape would look great with a die cut message. Bonus that it has adhesive so you don't have to fiddle with glue! There were some washi tapes that were just gorgeous and I love Little B tapes. I didn't want to decide between the two so I got these two metallic ones. That MT brand is an orange stripe (something I don't have) I thought would be nice for Fall themed cards. I threw in that mini X-acto knife because it was just so cute, and I don't really have one in my stash (other than the box cutter from the tool kit when I need it) A few crafty items I wanted to put on your radar and recap:
I am looking forward to getting started on some long paused projects as well as my holiday cards! More posting to come! Thanks for stamping by! 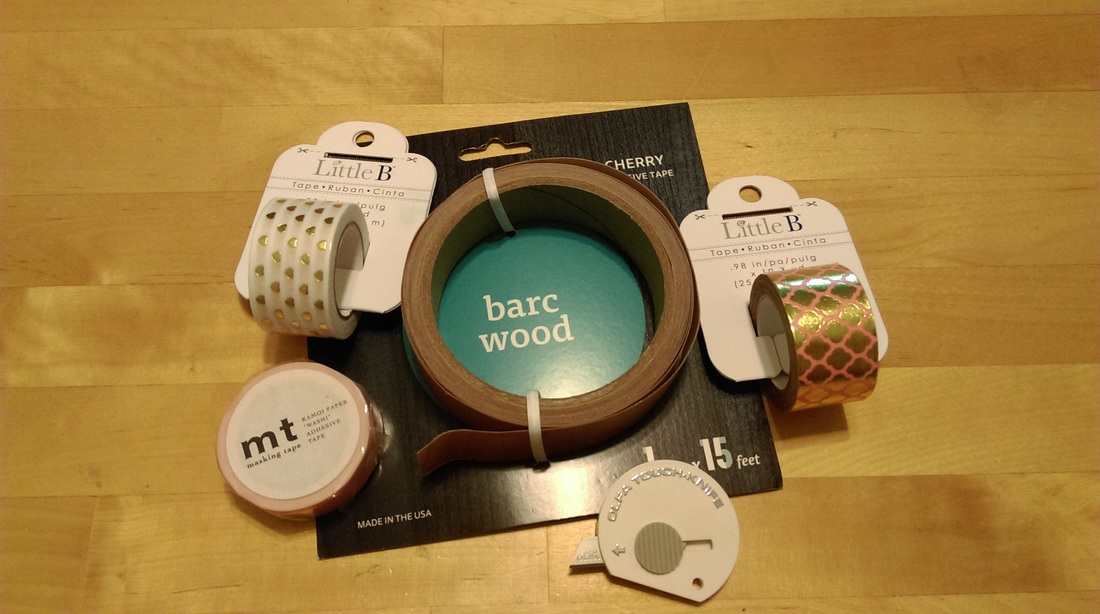 FLAX Haul |
FOLLOW ME
ABOUT ME
Pinterest pinner. Cupcake eater. Book reader. Twitter-er 
ARCHIVES
September 2017
CATEGORIES
All
|